First, allow your cucumbers to fully ripen indoors. By ripening ithey should get soft and you should store them in a cool dark place till this happens. When your cucumbers are fully ripe and cut them in half and scoop out the inside. 
Depending on the variety of cucumber that you're growing the seeds may or may not separate easily from the large white opaque-ish material that holds them together in the seat array. Using your fingers you should easily be able to squeeze out most of the seeds and remove almost all of the white opaque-ish material until you have something that looks like this
Note that it is very gelatinous and the seeds also are surrounded with a gelatinous type of coating. This is where some people will ferment their seeds and of course this is how we teach you to skip that process. First of all,add some water to this material and separate out any remaining bits of large pulp. Then depending on the size of your sieve, fill it with one third volume of seeds and gelatin and place it in your sink.
Using the nozzle from your kitchen sink spray directly into the seat and gelatin mixture. You will find that the water action in conjunction with the sieve itself will begin to break up and separate the seeds from the remaining bit of gelatin.
Do not overflow yourself and allow it to drain before repeating the process with the remainder of your seeds. Place this in another bowl while you finish repeating this process. After you have finished all your seeds you should now add some water to the bowl

That funny looking haze you see in this picture is the seedcoats that have begun to separate from the seed itself. Something else you'll notice is that the good seeds have already begun to sink to the bottom and the immature undeveloped seeds have begun to float to the top. Allow this mixture a couple of minutes to settle and then pour off some of this water/gelatin seedcoat/immature seed taking care to leave the good seeds behind. As you pour off, you'll be able to see the ghost like seedcoats that have separated from the seeds themselves, and can easily be removed by this pouring off process.
Repeat this process three or four more times and you will find that each time its repeated the water gets clearer and clearer. Finally drain all your seeds in the sieve and allow it to drain for a few minutes. 
I then place a towel on a plastic tray or in this case a lid to a plastic tote and on top of that I put a couple layers of paper towels. On top of the paper towels I have put the seeds to drain even more water off them and I am helping to encourage it by the aid of a small fan.
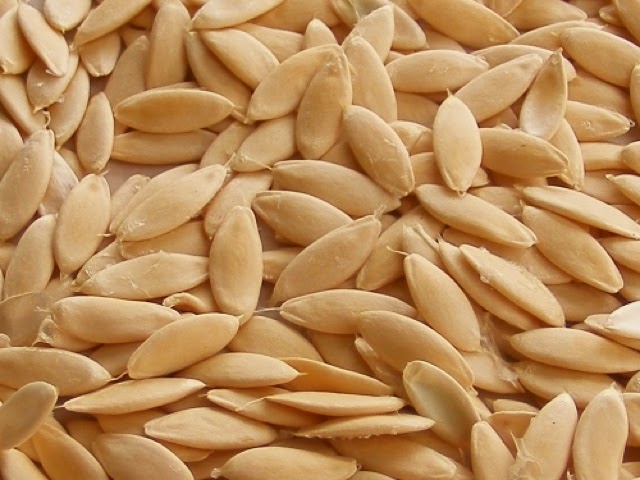
I picked this little fan up from a garage sale and it also has a heater option to it as well. This can work with some seed saving if you put the heat option on to encourage drying. Make sure if you are using a heat option to keep it at a distance from the seeds to prevent any accidental cooking. In this case I'm using no heat. I am only allowing this to run for 30 minutes to remove excess moisture from the seeds . I will remove the seeds from the paper towel and put them on the final drying receptacle. In this case it is in old tray to an old defunct microwave that I no longer own.  I could not bear to think about throwing out this beautiful glass tray just because the microwave did not work anymore. I often utilize this glass tray in seed saving. With some seeds that are processed wet it's best to do your final drying on either glass, parchment paper, or those silicone and plastic cutting board. Sometimes a window screen from a triple track storm window works well too.The final drying of seeds on towels or paper towels sometimes causes a nightmare with the seeds wanting to stick to themselves and the paper itself making separation hard. So I will only use the paper towel method to blot off moisture and utilize a glass tray for the final drying process. For the first few hours in final drying you should go through the seeds with your fingers helping to spread them around to ensure even drying. Usually within 24 hours you'll notice that the seeds have lost a lot of their exterior moisture and are now resembling the dried seed you buy in a pack.
  At this time you can turn the fan off and let your seeds finish air drying or you can speed the process up by keeping the fan on for the next day or two. Do not immediately pack the seeds in any kind of plastic receptacle. Just because they feel dry doesn't mean that they are dry and often the seeds will turn and encourage mold to develop if left in a environment like a Tupperware container or a plastic baggie. I will let my seeds dry for a full week before I pack them into paper envelopes.
Like these fine envelopes I got from office supply solutions http://www.officesupplysolutionsllc.com
They are fantastic and work well for our seed swaps and are freaking cheap too .
Grow seed
Save seed
Share seed
Save seed
Repeat